An introduction to this tool is covered in the video for Example 1: Getting Started
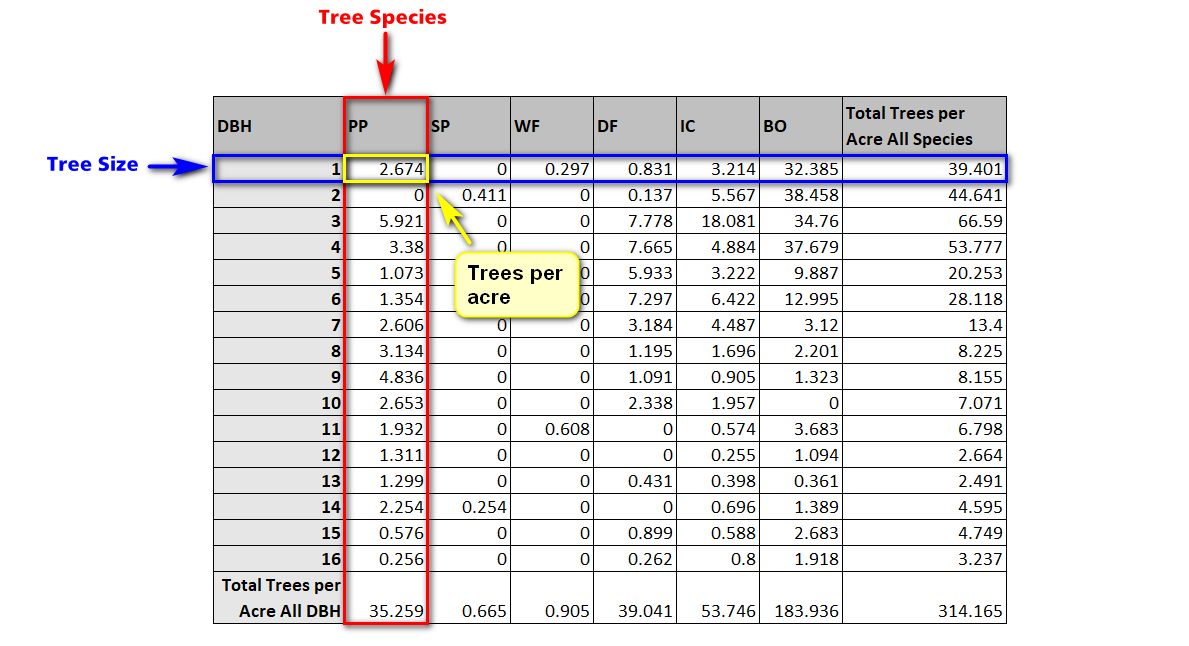
In the "stand table" format, the rows represent tree size and the columns represent tree species. The values in each cell describe the number of trees per acre/hectare for the corresponding species and DBH.
A note on units. There is a checkbox in the settings panel labeled "metric". If this checkbox is "on", table import will interpret values as cm and trees per hectare. If the checkbox is "off" (default), values will be interpreted as inches and trees per acre.gc
Tree Size (DBH): Input diameter at breast height. For imperial units, round to the nearest inch. For metric units, 5cm diameter classes are recommended.
Tree Species: VF species ID code used to assign a set of 3D models.
Trees per Acre (Hectare): Input number of trees (i.e. number of stems) per acre/hectare for the corresponding species and DBH. Note that because the terrain is 4 acres, values that are very small (for example, less that .125 trees per acre) might never appear in the scene. If a particular tree is important, but rare on the landscape, place it manually.
Exporting the table for Stand Designer
To format a stand table for Stand Designer, follow the example above. A totals column is required and must include the word "Total" in the column label. A totals row is optional. When you save the table, you must save it as a .csv (comma separated values). In Microsoft Excel, this can be accomplished using "Save As", then changing the file type to "CSV (Comma delimited)(*.csv)". Alternatively, if you use Google Sheets, you can use File -> Download -> "Comma-Separated Values (.csv, current sheet)".
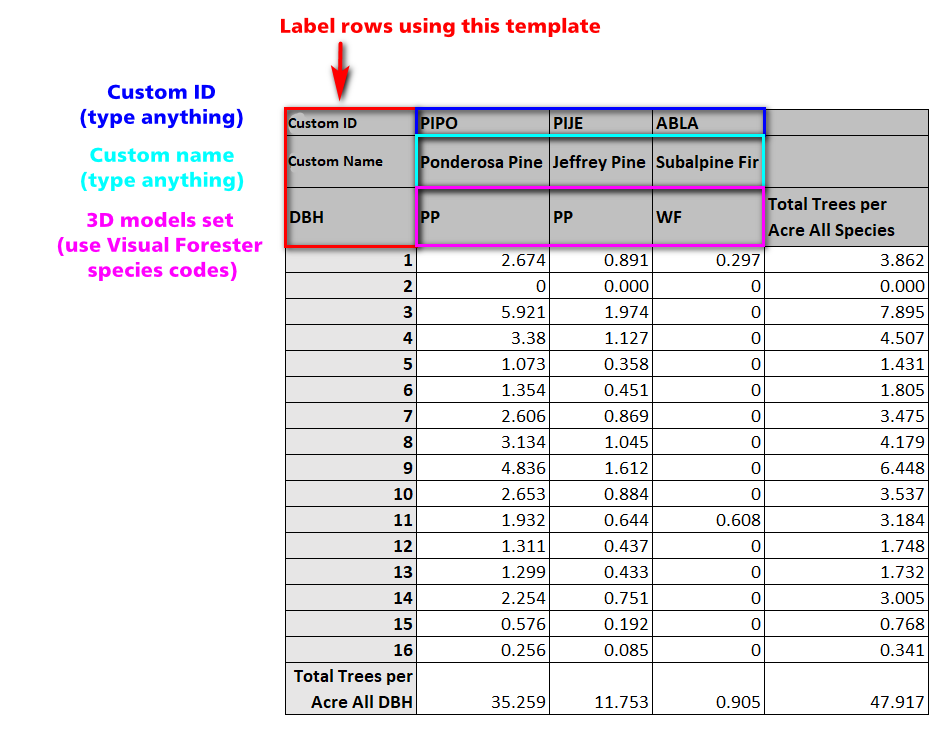
Optional: assigning custom species display name and ID:
As optional rows, you can assign a custom display name and custom display ID. The custom name and ID will show up in the tree info and inventory panels. See example below. This is useful if you need to utilize a surrogate species for the 3D model but would like to display the original species name/code that was recorded in the field.