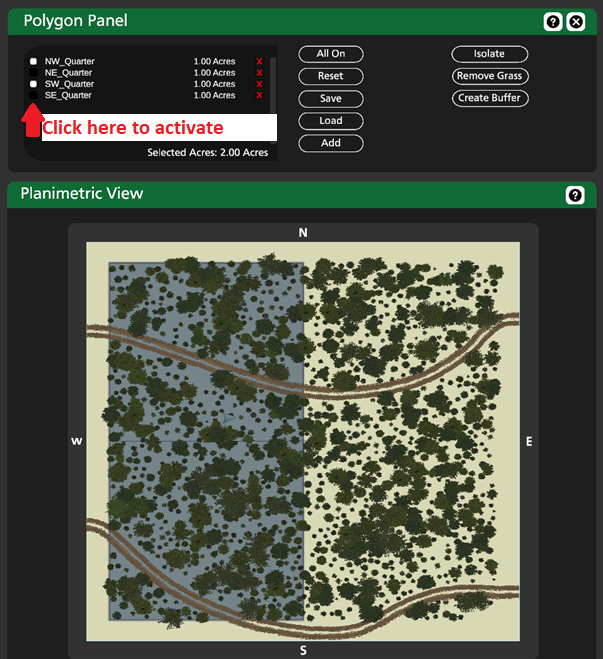
2.2 Polygon Panel
An introduction to this tool is covered in the video for Example 3: Small Landowner Inventory
Polygons are used to slice up the terrain and treat areas independently. Polygons can be used for:
- Placing objects
- Deleting objects
- Viewing inventory data
Using Polygons
- If all polygons are turned off, the polygon system is disabled and you will be affecting the terrain uniformly (default when opening Stand Designer).
- To start using the polygons system, you can turn individual polygons on and off by clicking the small square to the left of the polygon's name.
- If at least one polygon is turned on (active), you can select whether you want to affect the area Inside the active polygon(s) or Outside the active polygon(s). These buttons are in the upper left panel of the work menu. The total area selected is always visible in the bottom of the polygon list.
- The Selected Acres will act as a "mask" or a "filter" when placing objects, deleting objects, and viewing inventory data. To return to working on the full terrain, turn all polygons off.
Drawing a New Polygon
- Click the Add button
- Add verticies by left clicking the terrain in the planimetric view or the scene view
- Click Finish to complete the polygon
Create a Buffer Polygon
- Click the Add button
- Draw vertices in the shape of a line
- Click Create Buffer
- Type in a Buffer Radius
- Click Finish
Additional Controls/Features
- Use the Save and Load buttons to store and re-use polygons in other scenes. If you don't use these buttons, the polygons will still save as part of the .vl file for the scene.
- Use the Isolate button to hide all trees that are outside of your selected area. For example, you could draw a 50ft wide buffer polygon along the edge of the terrain, then use isolate to see a cross section of the stand. This is particularly useful in the orthographic view mode.
- Use the Remove Grass button to delete background vegetation inside selected polygons.